
 By John Siers
Time was when a customer wanted a gun “refinished” a gunsmith had only a few choices – blue or parkerize for the metal, and if the stock needed some work it was time for sanding, steaming, and maybe some Tru-Oil.
Nowadays, there are still a lot of black guns out there, but many of them are not parkerized, and blued finishes are getting harder to find. More often than not, you have to turn to the “Used Guns” section of your local gun shop to find one with wood furniture, and in case you haven’t noticed, guns are now appearing on the market in some pretty strange colors.
So… how do you deal with that? In many cases, the simplest solution is a product like Lauer’s DuraCoat. This is not to be confused with Cerakote, a heat-cured product that produces a very durable finish but requires extreme measures for surface preparation and special equipment such as a curing oven large enough to handle rifle barrels, stocks and such suspended on a rack.
DuraCoat is a chemically-cured finish – requires mixing of the color component and a hardener – that is much more durable than ordinary paint and will adhere to any properly-prepared surface. About the only thing complicated about the process is the mixing. Lauer recommends a 12-to-1 mix of color to hardener. Too much hardener will result in a glossy finish rather than flat, while too little hardener will result in a less durable finish.
 You can buy DuraCoat pre-mixed in an aerosol spray can, but I don’t much care for that. If you ever worked with any kind of spray paint, you know how hard it is to control the paint application and apply evenly without runs or drips. To my way of thinking, an air brush is the only way to go with this… so bite the bullet, open up the wallet, and get a good one, such as the Paasche “Master” air brush shown here. This is a “two-stage” brush, meaning that you push down on the button to start the air flowing, then move the button to the rear or back to the front to regulate the flow of paint. It takes a little practice to get used to this, so plan on doing a lot of spraying on paper before you start on your customer’s Kimber 1911.
 While you are at it, consider your source of air for the brush. That monster air compressor in your shop will certainly do the job… IF you can regulate it down to somewhere around 25-30 PSI. For myself, I ended up biting yet another bullet and buying a little compressor specifically designed for air brush work. It’s small enough and light enough that I can tuck it away in a cabinet when I’m not using it, and it runs very quietly. The last thing I want when doing delicate spray work is to have a big compressor kick in with an 85db racket to bring the tank back up to pressure.
While we’re on the subject of “delicate work” let me say you don’t really need to be an artist for this. Yes, I’ve seen some really creative stuff done by airbrush artists, and I wish I could do it; but much of the work you’ll do on guns just involves getting the right parts evenly coated with the right color. I’ve tried my hand at freehand “camo” and some of those projects have come out pretty well (at least, I thought so and the customers agreed); but it’s mainly a matter of a little practice with the air brush to figure out what you can and can’t do.
 Actual results? Well… here’s an example of what you can do with one of those cheap “pocket pistols” that have been discussed in a recent article here. This involved spraying the frame and slide in the ever-popular Flat Dark Earth, then applying free hand black “tiger stripes” to the slide. You can probably double the value of a gun like this with a little creative air brush work – especially if the finish on the gun is a little beat up to begin with.
In this particular case, I only applied the DuraCoat to the metal parts of the gun. DuraCoat sticks very well to degreased, not-too-shiny metal. If you are dealing with a chromed or hardened nickel-plated surface it probably won’t work too well, but for most other metal surfaces a little steel wool or fine sandpaper will probably rough them up enough to provide good adhesion. Parkerized or flat-coated surfaces are no problem at all. In any case, test it on the metal before you go for an all-out coating job. It’s easy to polish off a little bit, but removing a botched DuraCoat job from the whole gun could be a real pain.
I should mention that there is one other Lauer DuraCoat product you’ll need – Reducer. Use this (very sparingly) to thin the mixture for better airbrush application. I also use DuraCoat Reducer as the solvent of choice for clean up, making sure I thoroughly clean my air brush (by spraying clean, pure Reducer through it) before putting it away. I’ve already lost one airbrush because I failed to do that, and the darn things are too expensive to make that mistake again.
 Earlier, I mentioned the stock and/or furniture of a gun. While I am not about to try DuraCoat on a wooden stock, any of the modern polymer furniture is a canvas just waiting for your artistic touch. Here’s an example of a job I did for a customer on a Remington 770 – he wanted the whole rifle (including the scope) done in “Coyote” tan, with black “tiger stripes” on the barrel. Hey… this was not my idea – and the customer is always right (or so we’d like him to believe). In any case, it actually came out looking better than I expected.
Note that I did mask off the front and rear bells of the scope of the 770, to be sure I didn’t get DuraCoat on the optics themselves.
Note also that I didn’t do the recoil pad. One of my earliest projects was a freehand camo job on a Charter Arms AR-7 “Explorer” rifle, and I learned the hard way that DuraCoat doesn’t play well with flexible surfaces. As you can see in the picture here, I applied it to the butt cap of the AR-7, and it looked fine at first; but it began to flake off immediately as the butt pad was taken off and put back on repeatedly to stow and retrieve the action and barrel.
 On the rest of the rifle – metal receiver and barrel and polymer stock – the finish has proven very durable. Just don’t use it on anything subject to flexing and bending.
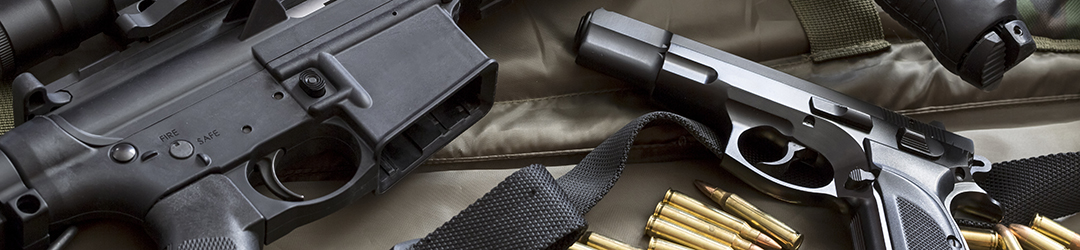
OK – so you’re not a big fan of pink, purple or green guns, don’t care much for Flat Dark Earth or Coyote Tan, and aren’t about to attempt any freehand camo. There is still one area where DuraCoat can help you, and that is with today’s ever-popular “black” guns. It provides the best quick, durable touch-up I can think of for nicks, scratches and just plain wear on today’s black rifles and pistols.
The picture below shows how I’ve used that to advantage – a couple of beat-up Lorcin slides and frames, and the slide from a Taurus TCP – all of which got a nice facelift in one session with the airbrush.
I was a bit wary of DuraCoat when I first saw it – wasn’t sure about its durability, or how much hassle it might be to use; but I’ve since become a fan. Now, I use it a lot and it has become my “Go To” refinishing method for “modern sporting rifles” as well as the latest generation of semiauto pistols.

Leave a Reply