
 by GunsmithUSA Contributor Dan Rogers
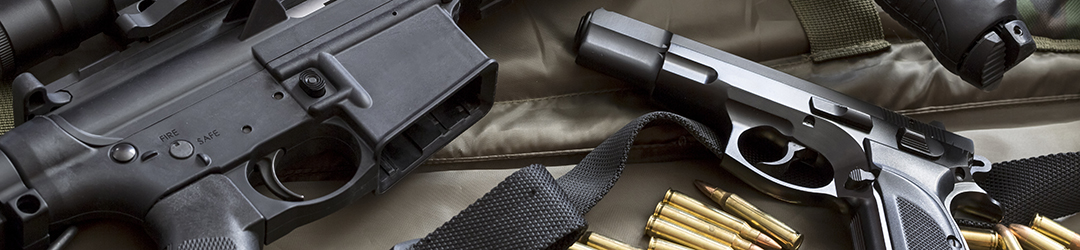
Recently a friend of mine brought me some of his grandfather’s guns to look at and assess. Most of them were in pretty tough shape. He had very little attachment to anything in the collection, but wanted to know what kind of shape the pieces were in and if any were serviceable and worth him keeping or investing in for repairs and refurbishment. There were a few really exemplary examples like a Belgian made SA-22 and an Enfield No.2 Mk I 38/200 RAF marked pistol. These two pieces were most certainly gems worthy of any distinguished taste, and both were in excellent shape. The vast majority of the collection though resembled this Springfield double barrel 12 ga. Guns that were used hard and cared for lightly.
 Despite its rough appearance the shotgun was in fine mechanical condition, so I thought surely it would be easy to clean up. I might even earn my gunsmithing restoration merit badge. I have repaired, finished, and refinished stocks as well as cleaned metal, but I have never really done anything resembling restoration work. What could possibly go wrong?
I started by disassembling the shotgun. I had a little trouble removing the screw that holds the stock to the receiver. I few drops of Kroil and some time to soak and it unscrewed effortlessly. I am realizing patience is not just a virtue or a useful characteristic in gunsmithing it’s a job requirement. The wood was not oil soaked, cracked, or badly dented, and the finish that remained came off easily with little effort and some 100 grit paper. I then smoothed and de-whiskered the stocks with some 220 grit and placed them aside.

The metal was missing almost all of its bluing and was in poor shape. It was deeply pitted in places and certainly showing its age and use! I initially started working the metal with 320 grit emery cloth and I was getting good results though the pits were not coming out very well. I knew my friend had a large cabinet glass bead blaster in his radiator shop so I asked if he would mind if I came by and blasted the metal parts. Once the parts were blasted they had a clean satin finish. I decided I would leave the receiver in this satin finish, but what to do with the barrels?
I strive to keep my project articles geared towards what I have heard John Siers call table top gunsmithing, or in my case kitchen table smithing. Like many of you out there I am an enthusiast with a penchant for learning and doing things as well as can be done within the confines of my tools and equipment. My intent is to share my experience in an attempt to inspire others to give things a whirl too, and I try and keep things in the realm of hand tooling and little to no special equipment. With this in mind I decided what to do with my barrels. I could have easily cleaned them up and sent them out to fellow writer and friend Paul Smeltzer for professional hot bluing or cerakote or any of the other options he is set up and equipped to do, but in doing so I would leave the realm of doing the whole project yourself in your home work space. With this in mind I made the decision to attempt to cold blue the barrels.
Our friends at Brownells have a product called Oxpho Blue. Oxpho Blue is a cold bluing solution that can be used for regular touch up work or to blue an entire firearm. It is available in either liquid or cream. My curiosity got the better of me, so I ordered both. The instructions on the bottle say that all of the old oil, bluing, and rust do not have to be removed to use Oxpho Blue, but we all know better than to do that. To prepare my barrels after blasting them in my friend’s cabinet I polished them with some 600 grit paper until they had a satisfactory luster. After polishing them I blew them off with compressed air to remove any large debris bits and then wiped them down with clean shop towels and denatured alcohol to remove any film or embedded oils. I then decided to heat the barrels to start the cold bluing process. I found some heat helps the cold blue react and penetrate the metal. Too much heat can be a problem though. I found getting the metal just hot enough to be uncomfortable to touch while wearing rubber gloves seemed to do well. I used some rubber gloves as to not impart any oils into the metal I was trying to finish. I used the stove top to heat the barrels and my diesel fired heater when my bride kicked me out of the kitchen. (Fair enough I knew I was pushing my luck, and it is a new stove).
With my metal now warm and two versions of Oxpho Blue to choose from I chose to lay the cream on first reckoning it would be easier to control and get a good solid first coat applied to the barrels. Focus is the name of the game here. Keeping the coat even while the metal is hot and ensuring everything gets covered. The instructions have you allow the solution sit for a minute and then wipe it off. I probably allowed mine to sit for more than a minute. I made sure I had an even coating using an Oxpho soaked cotton ball and when it looked as if the solution was drying out I wiped off the excess to prevent patches and streaking. I then burnished the barrels with some 0000 steel wool and reheated the barrels. I repeated the previous steps except this time with the liquid Oxpho. I noticed the liquid gives a deep black color and the cream has more of a blue hue. The combination of the two products when applied cautiously I think give a respectable finish. I continued burnishing, reheating, and reapplying the liquid Oxpho Blue until the desired finish darkness was attained. Once I had the finish I wanted I neutralized the barrels by wiping them down with acetone and oiling them. Again focus and even application are the keys to this process. Also cold blue does not wear as well nor penetrate as deep as any of the hot bluing techniques, so keep that in mind when choosing it as a finish technique.

Metal squared away I then turned my attention to the stocks I set aside earlier. I blew the stocks off with compressed air and then wiped them down with some acetone. I used Birchwood Casey’s Tru Oil to finish my stocks. I have always found stocks are easiest to work with while suspended. I fished a coat hanger through my stock and hung it in our wash room. I then took a cloth diaper and began applying a thin coat of Tru Oil. The stock looked tons better immediately. I found the key here is even thin coats and burnishing with some 0000 steel wool between coats.

Over the course of a weekend my stocks were done, and I reassembled the shotgun. I would like to think the shotgun looks a lot better. I now have a working firearm with a respectable finish. What do you guys think? I think about fifty dollars in materials and a little bit of time and effort payed off nicely. Do I get my restoration merit badge now? Until next time shoot safe, shoot straight, and do some ‘smithin’.

Excellent job (and an excellent article) — I’ve done a lot of these but I managed to pick up a few pointers. I’ve been using Oxpho-Blue myself, and I love it but I usually use it at room temperature — haven’t tried warming the metal first but you can be sure I’ll try that for my next blueing project. In return for that, let me give readers a pointer of my own — rather than using a cotton ball to apply bluing, I use so-called “wool” daubers that I discovered for applying stains to leather projects. They are sort of like a cotton ball on the end of an aluminum wire, but they are more firm than a cotton ball and don’t turn into a limp gob as soon as you wet them. Anyway they are available in quantity from Tandy Leather Factory, and I find them useful for lots of other gunsmith projects as well (cleaning guns comes to mind). I buy them in packages of 100. They have the additional virtue of keeping your fingers (and yes, I also use those disposable gloves) out of whatever liquid chemical agents you are using, whether it be Oxpho-Blue or CLP. Anyway, Dan, your project looks great! I love those old double guns, and you’ve probably made this one good for another 50 years or so.
Oh, and P.S. I like your idea of leaving the receiver “in the white” – I’ve done that myself with a couple of old break-top revolvers after blasting off what remained of their chrome plating (invested in a bead blast cabinet myself a couple of years ago, and it has paid for itself many times over). I usually just rub the parts down with CLP afterwards so the bare metal doesn’t rust.
Good tip John. Here’s a link to those wool daubers from Tandy:
https://www.tandyleather.com/en/product/wool-daubers
I’ll have to check the daubers out. Thanks for the input and comments to both of you! And yeah she got a gentle massaging of Break Free all over the metal parts when I got done. Poor ole girl probably has no idea what to do with herself anymore!
Thanks for the tips and encouragement.
Another great article rich with character from our friend Dan Rogers! Gun looks miles better Dan!
I can never get enough restoration perspectives from ya’ll. It seems there’s always something to learn from everyone in restoration. It really helps me to hear this type of stuff from everyone.
The kitchen ‘smithin AND most of all the diaper thing really got me laughing! Hope the wife didn’t catch on to you regarding that Dan! May have to grab a value sized diaper cloth box from Costco for my “shop (spare bedroom)”.
I have a brand new bottle of True Oil just waiting to be used on a stock restoration for a friend. Never used the stuff before but it seems everyone loves using the stuff!
Question: I’m wondering how you did the de-whiskering? Did you lightly water soak the stock, or lightly alcohol soak the stock and then sand out the whiskers? Or rather did you just sand over the stock’s already occurring whiskers?
Always proud of someone who gives good thought towards a project/task and tries it through! Way to go buddy! Good job too!
Looking forward to more from you Dan. What I like most is how you share YOUR unique thought process and how you describe your steps involved along the way. Personally I can never get enough details!
Thanks for taking time out of your busy life to share your ‘smithing excursions! Always appreciated here!
Cheers!
I loved your unique title for your article here “Dabbling in Restoration”. Unique title, and catchy!
I’m wondering why you used acetone to “neutralize the barrels” before applying oil to them? After the last coat of cold blue, rinse, dry and light pass over with 0000 steel wool I’ve always just oiled and all was said and done. Just curious regarding this.
And by the way, I think you’ve earned your restoration merit badge here. Stand tall and wear it proud!
Cheers
Dana! Thanks for your comments and queries! I sanded the whiskers after I got all the finish off with the 100 grit paper. I blew the stocks off with compressed air and wiped them down with acetone to help pull the dust and any oil out of the grain. I then used some 220 paper to sort of smooth and de-whisker, and when I felt all was well I wiped it again with some acetone and then used some fine steel wool immediately after. At this point I felt things were smooth and clean enough to begin finishing.
Acetone does a good job of drawing debris and oils out of the grain. That’s a trick I picked up refinishing hardwood floors when I was a kid.
As for the acetone on the metal after blueing. That was probably superfluous, but I had the acetone out so why not.
Thanks for your input. I’ll sew my restoration merit badge on my Junior Gunsmithing sash and wear it proudly!